
Quick Answer
If your home was hit by hail or high wind, document everything before you change anything: take wide and close photos, note the date/time of the storm, and prevent further damage with safe temporary measures (like a tarp) while saving receipts. Most homeowners policies often cover sudden storm damage, but not normal wear-and-tear—so clear documentation and a clean timeline are what help your claim get approved and paid correctly.
Quick Decision Tree
Use this right after the storm:
If you see active leaking inside → prioritize safety + temporary water control (buckets/towels), then document, then call for emergency mitigation.
If you see missing shingles / lifted edges / debris → document from the ground, prevent more damage, schedule an inspection.
If you’re not sure (most people aren’t) → document storm context + collateral damage (gutters, downspouts, siding) and get a pro inspection.
If an adjuster appointment is scheduled → document before they arrive, and have your notes/questions ready.
First 48 hours checklist (post-storm)
1. Safety first (don’t skip this)
Stay off the roof. Wet shingles + steep pitches are a fall risk.
Watch for downed power lines, broken glass, sharp metal, and loose branches.
If there’s structural sagging, ceiling bulging, or electrical hazards: get out and call for help.
2. Capture “storm proof” (context matters)
Before you take close-ups, establish that a damaging event happened:
Screenshot your weather app showing hail/wind event timing (or local storm report)
Write down:
Date/time of the storm
Estimated hail size (if known) and wind conditions
What you heard/observed (loud impacts, debris, sudden leaks)
3. Photograph everything (wide → medium → close)
Use this simple photo order so the story is clear:
A) Wide shots (from the street/yard)
Full roof from multiple angles
Each roof slope you can see
Any trees or debris that fell near the home
B) Medium shots (building components)
Gutters, downspouts, fascia, soffit
Roof vents, pipe boots, chimney flashing areas (from the ground if possible)
C) Close-ups (damage details)
Dented gutters/downspouts
Torn/lifted shingle edges
Missing shingles
Granules collecting at downspouts/splash blocks
Interior water staining, ceiling bubbles, wet insulation (if visible)
Pro tip: Turn on time/location stamping in your camera settings if you can, and take a short walkaround video narrating what you’re seeing.
4. Prevent further damage (and keep receipts)
Insurance typically expects you to mitigate further damage when it’s safe to do so.
If water is coming in: collect drips, move valuables, and call for emergency tarping if needed.
Keep receipts for tarps, fans, dehumidifiers, or emergency services.
Don’t throw away damaged materials if they’re removed—save samples if possible.
5. File the claim (or at least start the claim conversation)
When you call your insurer:
Ask what they need you to submit (photos, dates, repair estimates).
Ask about your wind/hail deductible (it can be different from your standard deductible).
Ask how they prefer you to handle temporary repairs and reimbursement.
6. Schedule an inspection (and be there if you can)
A good inspection should include:
A documented assessment of each slope
Photos of any hail strikes, wind-lift patterns, and soft metals
Notes on code-related items (drip edge, ventilation, etc.) that may apply if a replacement is warranted
How to spot hail vs wind damage
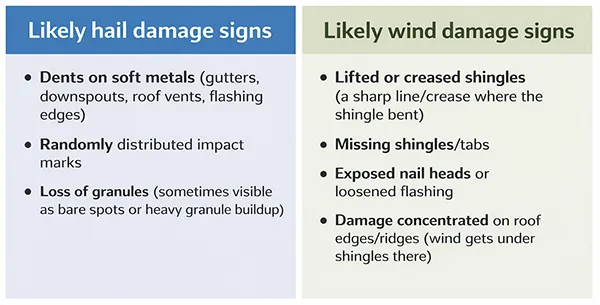
Common hail damage signs
Hail damage often shows up as:
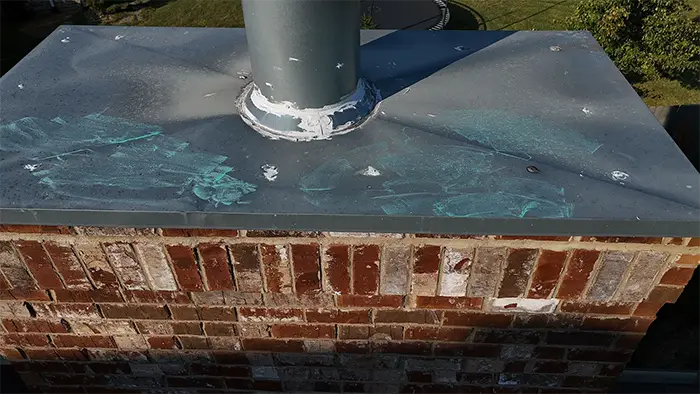
Dents on soft metals (gutters, downspouts, roof vents, flashing edges)
Randomly distributed impact marks
Loss of granules (sometimes visible as bare spots or heavy granule buildup)
What makes hail tricky: the roof can look “fine” from the ground while still having bruising/impact that reduces life expectancy.
Common wind damage signs
Wind damage often looks like:
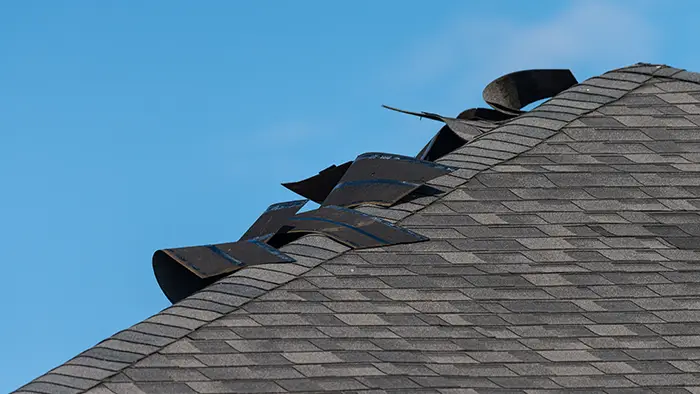
Lifted or creased shingles (a sharp line/crease where the shingle bent)
Missing shingles/tabs
Exposed nail heads or loosened flashing
Damage concentrated on roof edges/ridges (wind gets under shingles there)
“Wear-and-tear” vs “storm damage” (why claims get denied)
This is one of the biggest misunderstandings.
Storm damage = sudden, accidental damage from a specific event (hail/wind).
Wear-and-tear = aging, brittle shingles, long-term deterioration, poor maintenance, prior repairs failing.
Your documentation helps show:
Timing (this started after that storm)
Consistency (damage patterns match hail/wind)
Collateral (metals/siding/fencing also hit)
What to do before the adjuster arrives
Think of this as preparing a clear “case file.”
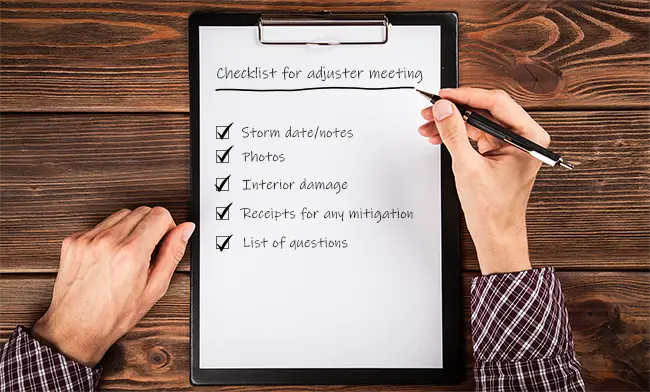
Your adjuster-ready packet
Storm date/time notes
Your best photos (wide + close)
Interior damage photos (if any)
Receipts for emergency mitigation
A short list of questions (below)
Questions worth asking
What deductible applies here—standard or wind/hail?
Are you paying ACV (actual cash value) first and releasing recoverable depreciation later?
Will code upgrades be considered if required locally?
What’s the process for supplements if additional damage is found during repair?
What not to do
Don’t start permanent repairs before the inspection (unless safety demands it).
Don’t sign anything you don’t understand, especially on-the-spot commitments.
Don’t assume the first number is final—storm claims often evolve after a full scope is documented.
Regional reality check
Hail-prone regions (e.g., Great Plains, Front Range, parts of the Midwest/Texas): hail strikes and collateral metal damage are common discussion points.
Hurricane/coastal wind regions: wind-lift, debris impacts, and water intrusion are frequent claim drivers.
Forested/mountain regions: tree/debris damage can create obvious punctures but also hidden flashing/edge issues.
Even if you’re not in a “hail hotspot,” wind events and mixed precipitation storms can still create claim-worthy damage.
How insurance payout usually works
Policies vary, but many claims flow like this:
Claim opened (you report storm date + damage)
Inspection/adjuster visit
Estimate issued
Payment released (sometimes initial ACV)
Work completed
Final documentation submitted
Recoverable depreciation released (if applicable)
The big lever you control: quality documentation + clear scope so the estimate matches the real work required.
Post-storm contractor red flags (especially after big events)
Be cautious if someone:
-
Pushes you to sign immediately “to get on the list”
-
Claims they can “waive your deductible” (this can create legal/insurance issues depending on state and how it’s done)
-
Won’t provide a written scope
-
Won’t explain the process in plain language
A good pro will help you understand the process and will document thoroughly—without pressure. Look for a roofing contractor that is local and rooted in your community, with a number of positive reviews and testimonials online. Just because someone knocks on your door does not mean they aren’t trustworthy, but it is important to ask the right questions and make sure they will be around in the future for any potential warranty claims or assistance you may need.
Homeowner Checklist
Write down storm date/time + what happened
Take wide/medium/close photos + a narrated video
Photograph gutters/downspouts/vents (easy hail proof)
Document interior leaks/stains
Prevent further damage safely; keep receipts
Call insurer; ask about wind/hail deductible
Schedule an inspection; be present if possible
Keep all notes, estimates, and communications organized
FAQs
Take the Guesswork Out of Post-Storm Roof Damage
If you’re post-storm and unsure what you’re seeing, the fastest path is a documented professional inspection and a clean photo record. Even if you don’t file a claim, you’ll know where you stand—and if you do, you’ll have what you need to support an accurate scope.